Verifying your information and logging in
You will receive an email from Trumba asking you to either verify your email address or to let you know you’ve been provided with backend editor access.
You will always login to Trumba using your uNID and password. You should bookmark this link to use every time you log in to the back end of the system: https://www.trumba.com/sp/signin/644577
**Please double-check your bookmark to ensure this exact link is bookmarked and not the redirect from the university’s DUO2 authentication.
Adding events to your calendar
Step 1: When you log in to the backend of the Trumba calendar system, click on the blue “Add Event” button at the top.
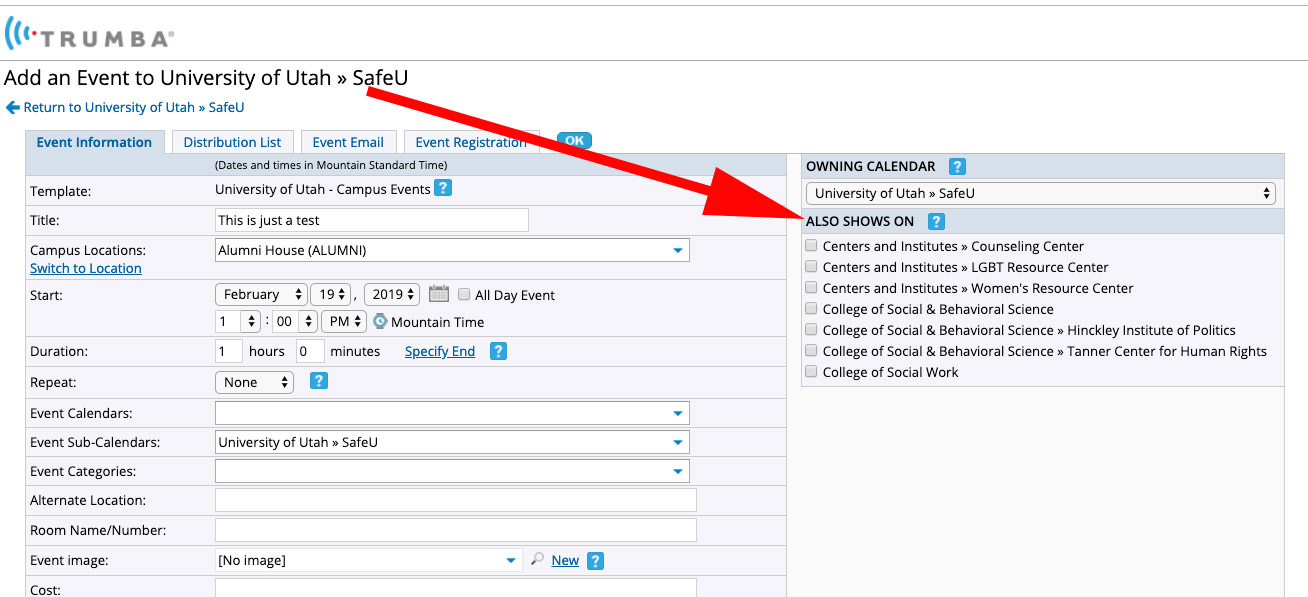
 The “Event Information” submission form will open. If you have access to multiple calendars, it will tell you at the top which calendar you are adding the event to and please fill out as much of the information in the form as possible.
Step 2: If your event is a repeating event, follow Step 3 , if not, skip to Step 4.
Step 3: Click the drop-down menu labeled “None” next to Repeat and select how often you want your event to repeat.
**It’s recommended you place repeating events for each semester or academic calendar year. PLEASE DO NOT SELECT “No End Date.”

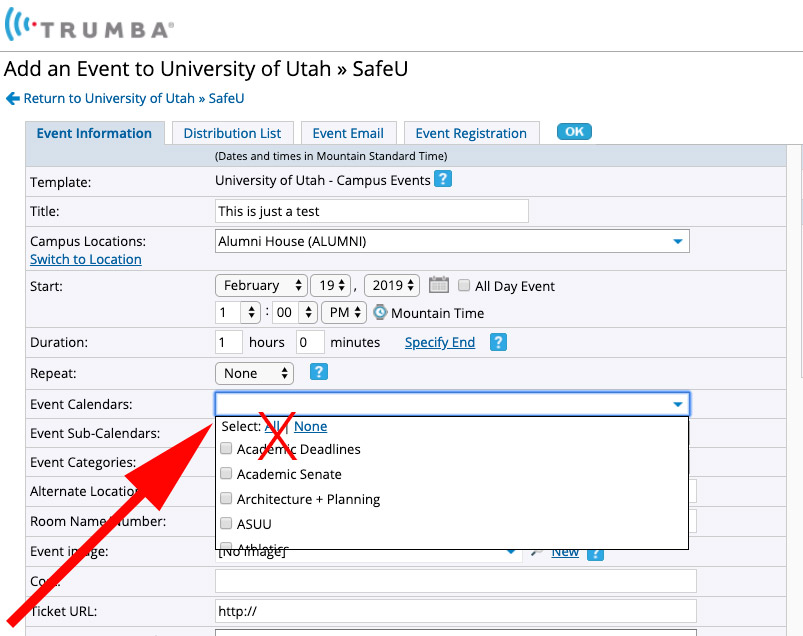
Step 4: You will need to select your calendar in the dropdown. It will fall under either “Event Calendar” or “Event Sub-Calendars.”
- The “Event Calendar” dropdown will have most of the main colleges listed. Scroll through to see what’s listed. Scroll through the list and see what’s listed. Find your calendars and check them (if applicable).
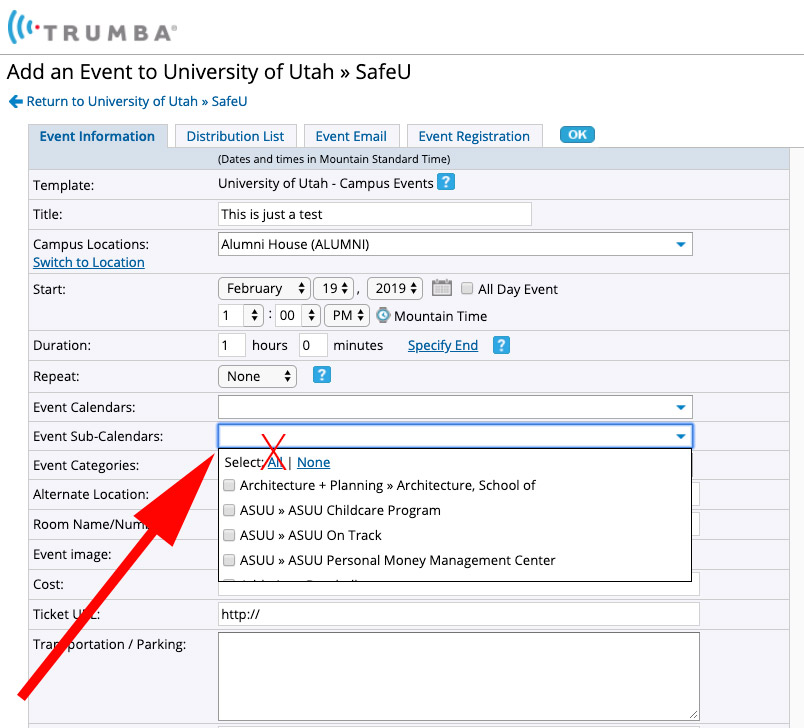
- The “Event Sub-Calendars” dropdown will have the departments and/or programs that fall under the main college. Scroll through the list and see what’s listed. Find your calendars and check them (if applicable).
- **Most departments place events on their own calendar, any co-sponsors’ calendars and maybe a couple of other applicable calendars.
- DO NOT SELECT “ALL” IN THE DROPDOWN and do not choose more than a few calendars other than you’re own calendar to put your event on. ALL events automatically get placed on the main University of Utah calendar and will show up on events.utah.edu.
[bs_row class=”row”]
[bs_col class=”col-sm-6″]
Event calendar
 [/bs_col]
[bs_col class=”col-sm-6″]
Event sub-calendar
 [/bs_col]
[/bs_row]
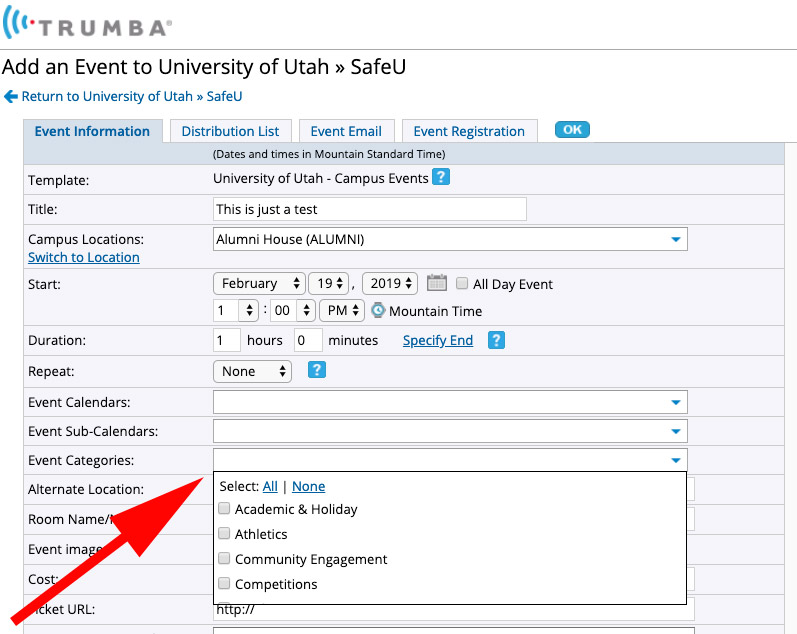
Step 5: If you would like, you can select an “Event Category” from the dropdown menu.
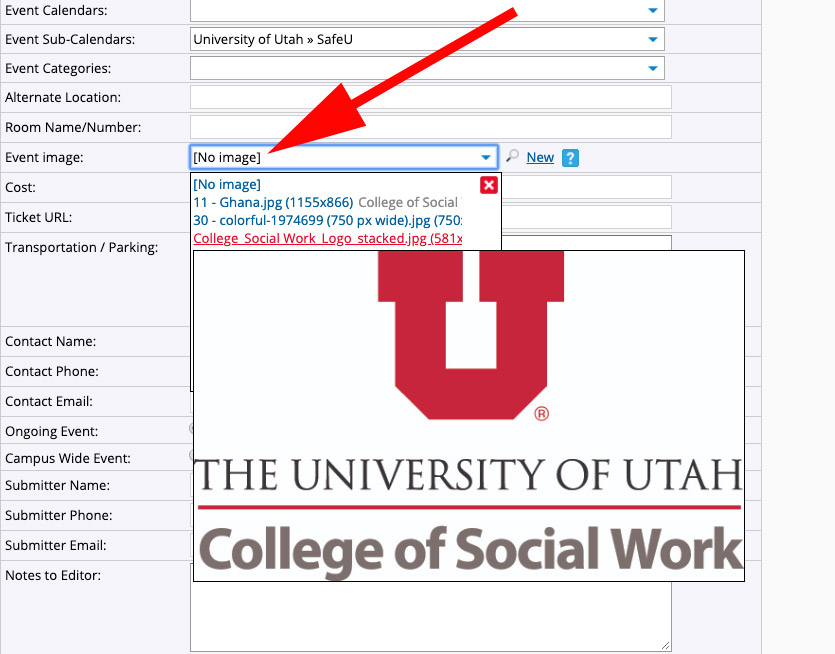
Step 6: I recommend you always add an image to your event. Those with images get more clicks than those that don’t.
- To upload a new image, click “New” and and “Add an Image” box will open. Choose a file or enter a web address of an image.
- If you check the “Frequently Used” box, it will upload the image into the backend of the system into a photo library. Most departments do this for generic images like departmental logos that can be used for more than one event.
- PLEASE NOTE: You may only upload PNG, JPG, TIF and GIF. PDFs cannot be uploaded.
[bs_row class=”row”]
[bs_col class=”col-sm-6″] [/bs_col]
[bs_col class=”col-sm-6″] [/bs_col]
[/bs_row]
- To access your frequently used photo library, click the “No Image” dropdown and your list of photos will show in the dropdown. Select one.
Step 7: “Ongoing Event” will always default to “No” and “Campus Wide Event” will always default to “Yes.”
- If your event is ongoing, please check “Yes” on “Ongoing Event.”
- If you don’t want your event to show up on utah.edu/events, but you would still like it to show up on your own website, click “No” on “Campus Wide Event.”
Step 8: “Submitter Name,” “Submitter Phone” and “Submitter Email” WILL NOT show up on the front end of your event submission. Please at least put your name and email so our team can contact you with any questions/issues.
Step 9: Please ignore “Notes to Editor,” “Owning Main Calendar Only,” “Owning Sub-Calendar Only” and “Filter Tags”—unless you have been instructed to use these sections.
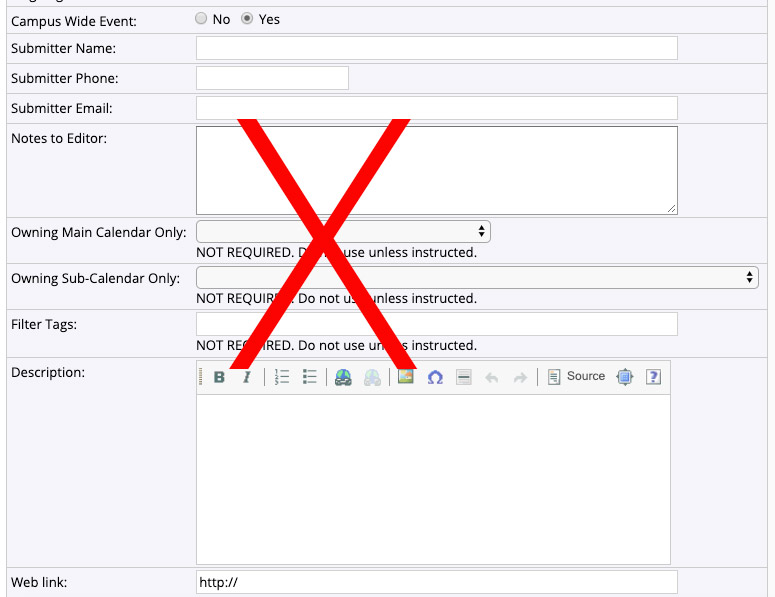
Step 9: “Description” is where you can put all the information about your event. You must always enter information under the “Description” section.
Step 10: You can include a link to your website or a direct link to an event page under “Web link,” but it’s not required.
Step 11: Scroll back up to the top of the submission form. If you have access to multiple calendars AND you want this event on those calendars, check those calendars on the right side of the submission form under “Also Shows On.”
Managing events on your calendar and removing unwanted content
If another college, department or program has put an event on your calendar and you would like to remove the event, click the arrow next to that event and click “Remove from (whatever your calendar is called).” That department will no receive a notice that you removed their event from your calendar.
See photo below:

If you would like to edit an event that you own, click the arrow next to the event and select “edit” or click on the title of the event.
If you would like to delete an event that you own, click the arrow next to the event and select “edit” or click on the title of the event and scroll to the bottom of the event submission and form and click “delete event.”


I made changes to events. Why don’t I see the changes on my website?
If you make and save changes to events on Trumba, the changes will appear on your live site. You don’t have to re-embed any code.
If you’re not seeing the changes on your live site, try this:
- Wait 10 minutes or so (sometimes a little longer) and refresh the webpage.
- Be patient. There is a short delay between when you save changes in Trumba and when they go live.
- If refreshing doesn’t work, clear your browser history (sometimes called the cache) or try viewing the changes using a different browser.Spuds sometimes get cached. That is, a version of the webpage containing the spuds gets stored on your local computer so the browser can open it more quickly than it could by returning to the original webpage.By clearing the cache, you get rid of the outdated versions of the pages.
I have additional questions about Trumba and I need help
If you have additional questions, take a look at some of the help documents Trumba offers, read more about adding events below or click on “help” on the top right corner of the screen.
